
The next month is going to be full of happy surprises for Sweap’s users. We’re launching “The Sweap 3” - a trio of innovative new features which will ensure our Event Efficiency Platform remains at the very top of its game. With the next two features en-route within weeks, we’re delighted to be able to tell you about one that’s already live: “Event Creation”.
When users visit our event platform, they will find a new button to click on: “Create Event”. While small and understated, this little button packs one hell of a punch. As has been widely reported, event professionals’ lives are low on time and high on pressure. Our Event Creation feature allows an event, with all its thrills, to be created and marketed in a matter of moments.
It takes less than five minutes to create an event on our platform. By the end of which, users will have a branded bespoke event with customised objectives, including linked social media, up to ten different email templates drafted, a registration page published, a modular Virtual Event Platform set up, and/or an on-site setup plan ready. And that’s only scratching the surface.
And remember, nothing is set in stone – the Sweap Event Efficiency Platform has all the capability to customise these sections to your heart’s content post-completion.
“Event creation at the click of a button.”
Sounds too good to be true? It isn’t. Check out the explanatory video above or a brief rundown of our automated event creation feature’s steps below – each with an approximation of how little time it should take you.
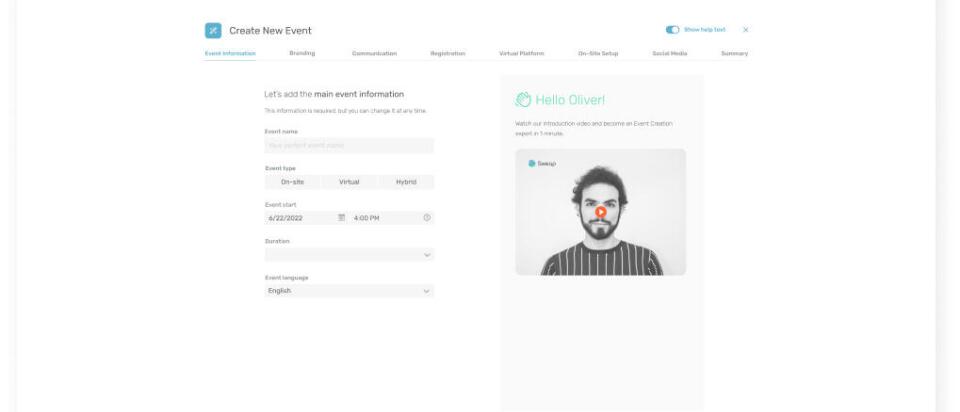
Step 1: Event Information
Estimated time-taken: 30 seconds
First things first, it’s time to fill in the very basics of your event. Give it a name, a language, a date, and a time. Will you have attendees coming from abroad? Avoid any time-zone confusion by inputting it here. The only other remaining thing to do is choose whether your event will be virtual, on-site, or hybrid. This choice will determine which sections you will have to fill in later.
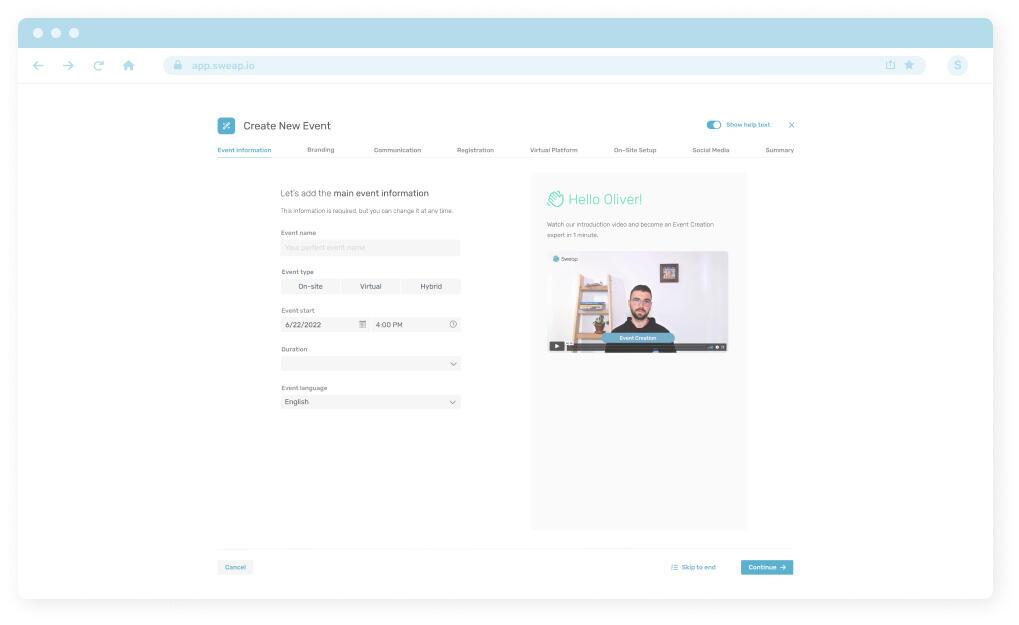
Add the basic information of your event here
Step 2: Branding
Estimated time-taken: 60 seconds
Now it’s time to personalise. Upload your logo and if you have brand colours, select them from the colour wheel. Alternatively, just choose a colour palette that matches your event. To make things even faster moving forward, you can save these choices to your account and automatically select them during the creation of future events.
Next, upload an event cover photo; either one you’ve had made especially or a relevant rights-free image. All your choices in this section will be automatically applied to the website, virtual platforms, and communications related to the event. Though as with all aspects of our streamlined Event Creation feature, these can be customised at a later date.
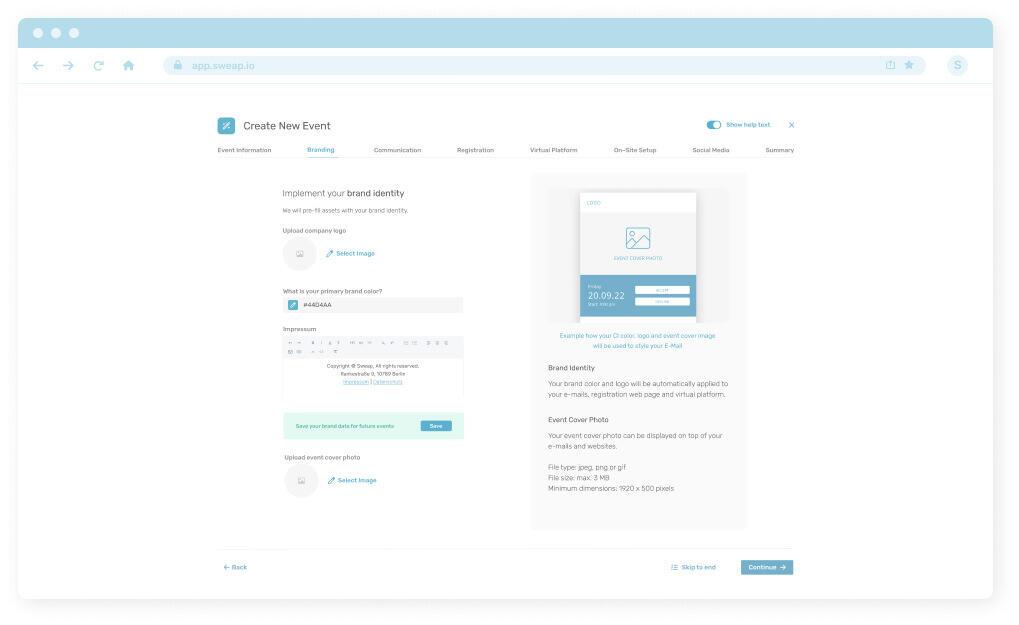
Upload your company logo and define the primary colour
Step 3: Communication
Estimated time-taken: 30 seconds
Setting up your communications plan is a breeze. Simply add send & receive email addresses and define the emails you’d like to send out from our tick list. These will then be auto-drafted and ready for you to customise later.
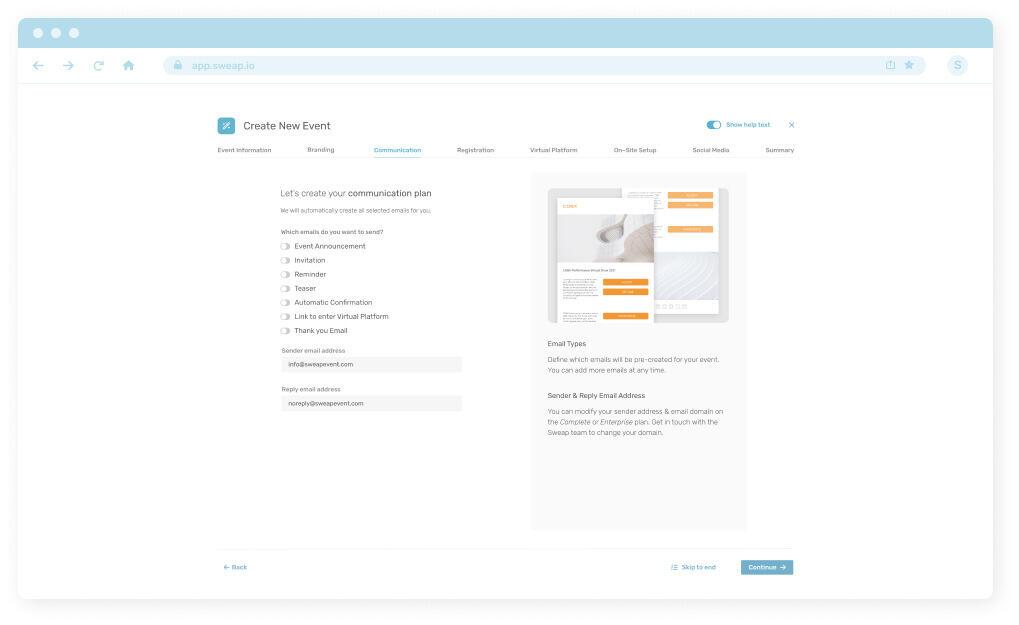
Choose from our pre-written and editable email templates
Step 4: Registration
Estimated time-taken: 60 seconds
Creating the event registration page is simply a matter of choosing what you would like to highlight. Will you prioritise your list of speakers, sponsors, or the agenda? Perhaps you’ll instead choose a more visual route with video and media emphasised. Maybe all of the above.
Following that, add in how many registrations you’d like to achieve (and if you have a maximum registration limit). All that’s left is to choose an event suffix for the URL. We recommend the event name.
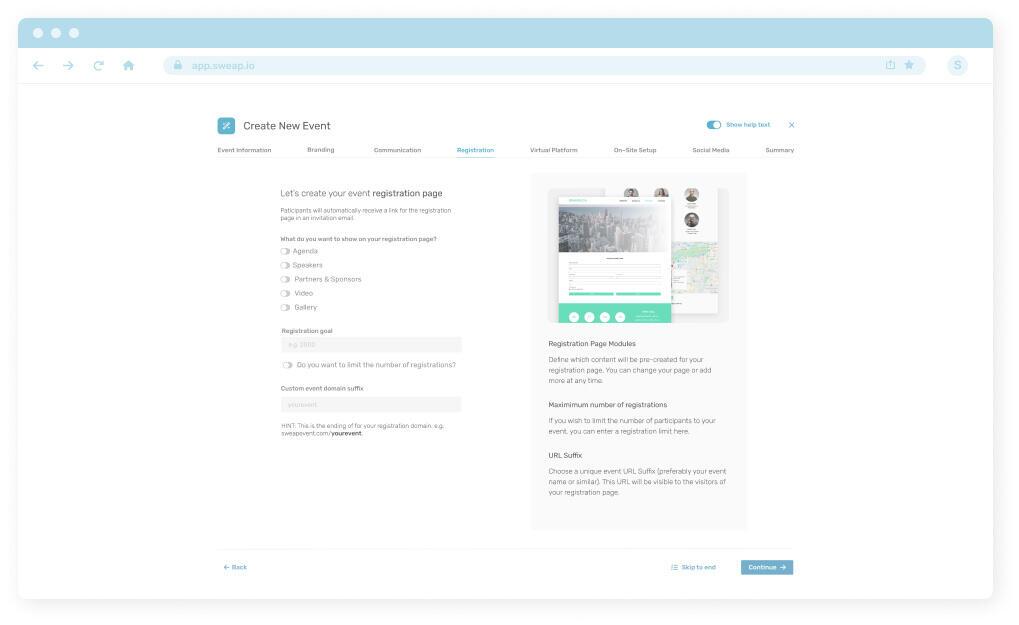
Define the elements you want to show on your registration page
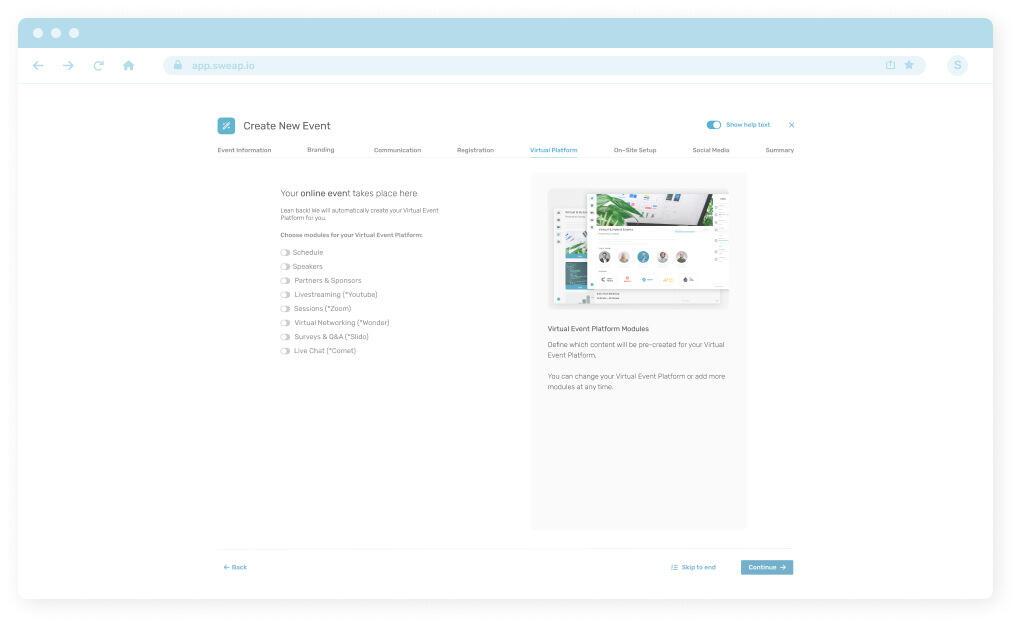
Step 5: Virtual Platform (for Virtual + Hybrid events)
Estimated time-taken: 30 seconds
Content is king, especially when it comes to professional events. If you selected the Virtual or Hybrid event in Step 1, you will now have access to the modular Virtual Platform page. Simply select the modules you’d like to include, such as live streaming or chatbots, and… hey presto!
Define the elements you want to show on your registration page
Step 6: On-site Setup (Live & Hybrid only)
Estimated time-taken: 30 seconds
If you chose a live event or a hybrid event format, you will be directed to the short and sweet On-site Setup page. Select the event location on the map, paste in its website URL, and add some contact details to help guests find the venue.
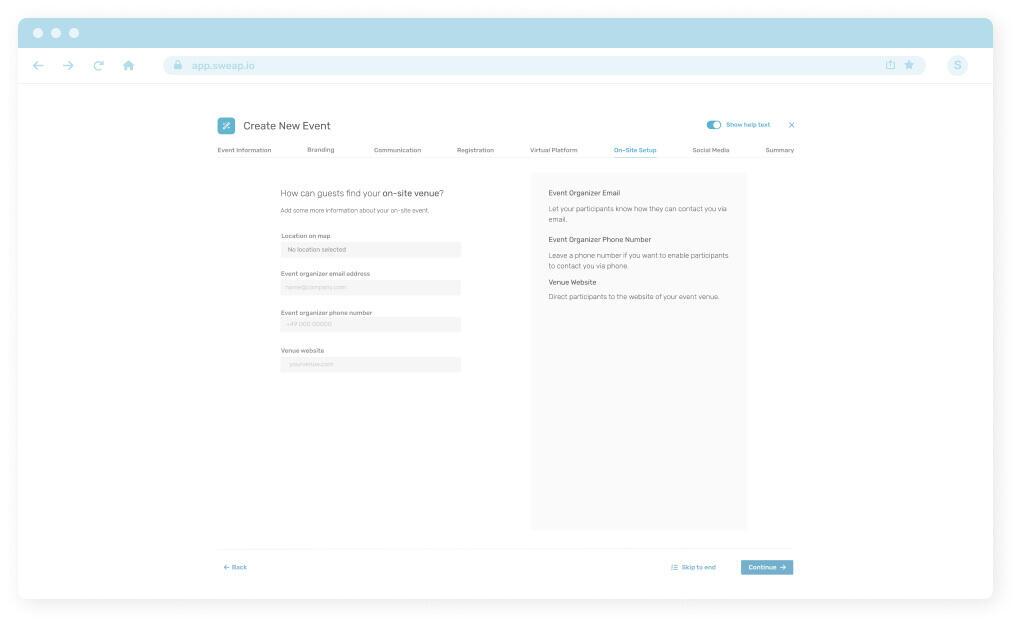
Add the contact information for your on-site event
Step 7: Social Media
Estimated time-taken: 30 seconds
If content is king, connectivity is queen. By linking to your social media channels this once, you’ll never have to do it again in any of your event comms, registration pages, or virtual event platforms – it will all be done for you.
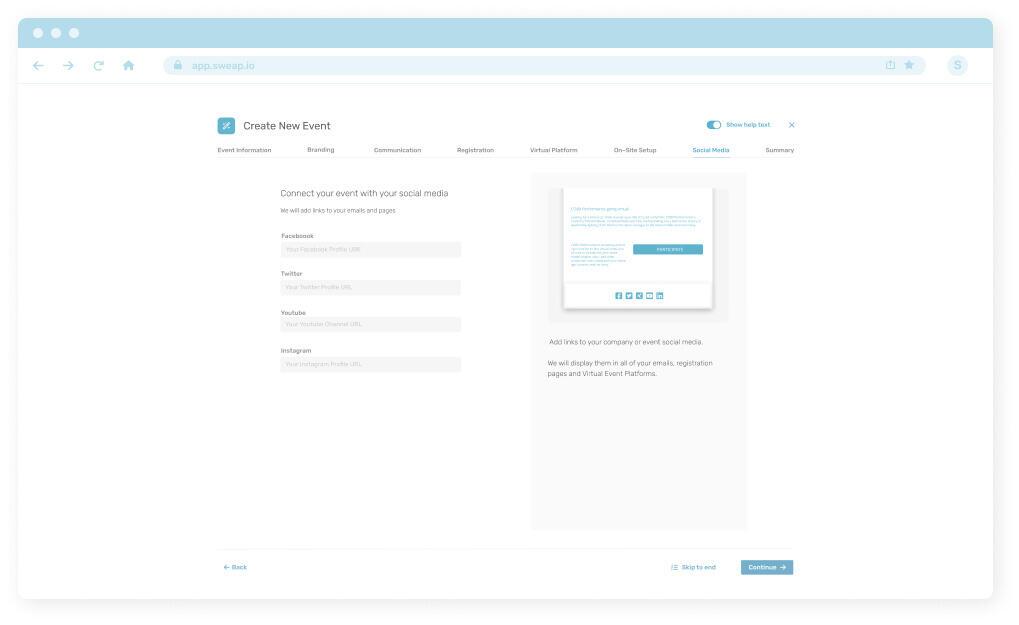
Add your social media links to your event
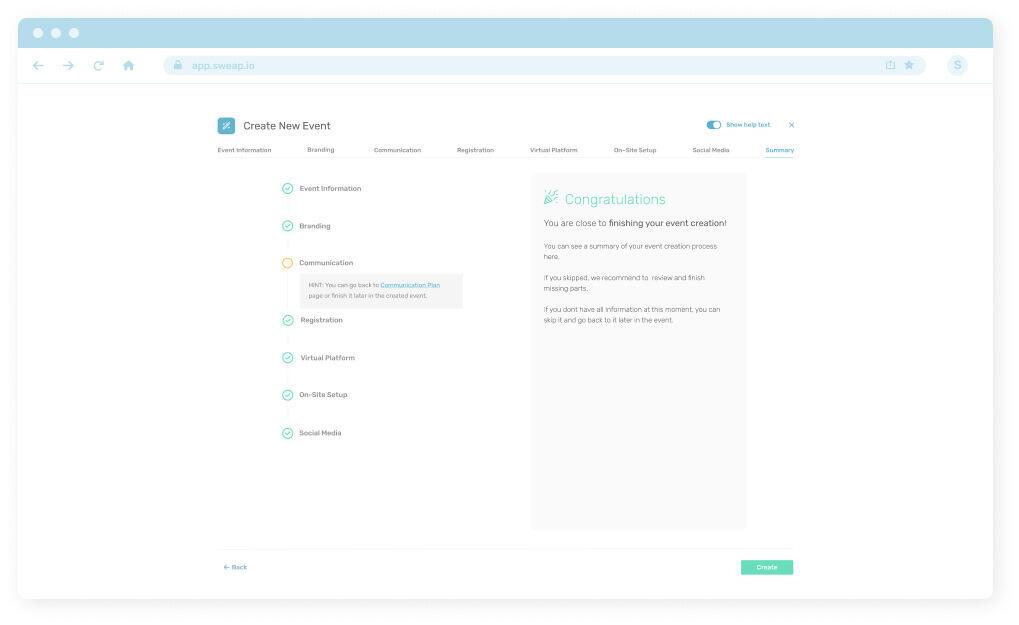
Step 8: Summary
Estimated time-taken: 20 seconds
The final section requires no input at all, assuming the other steps have been completed properly. Its purpose is simple – to let you know if any of the previous steps are incomplete. Whether you’ve received all green ticks or you’re leaving some unfinished for later, all that remains is to click “Create” and watch the magic happen.
The Final Touch
You can now open your oven-ready event and customise it to your heart’s content. You’ll be able to browse through your pre-written emails and edit where necessary, import and export contacts, and add your event info.
How much time you spend customising these sections is up to you. It could be as little as another 5 minutes, or you could really put in the time to create something unique to stand out. The more details you added earlier, the better and more specific your event will be.